New home for the waterlilies

For the past year my waterlilies (all eight of them) have been snuggled in the first of the three ponds to be completed. They have done well but need to be repotted and given more space.
The ponds were roughly dug out three years ago when we had to put in pipes to get water from the well to the house (via a shed with filters installed) and while we had the mini-digger we had a madly busy weekend and dug out the ponds. These will be linked by a stream and the water pumped from the lower to the higher, but without a huge fountain.
Well, the other two ponds have been a long time coming. Lining the ponds is a summer job because the holes fill with water in winter so, if it was to be done this year we had to get our skates on. The past week was forecast to be mild, dry and not windy – we seized the moment!
Because the ground is not level it meant we had to install a concrete surround. It had to be very level since the water should just overflow from one corner into the stream and it is surrounded by paving. (I have made gently sloping ends and the other two ponds will have/do have vegetation to the pond edge so I am thinking of wildlife). The concrete was completed last weekend,

I decided to line the hole with sand first, partly because I could not get pond underlay and the advice of using old carpet did not appeal much because I do not like the idea of burying all those chemicals, plus where do you get that much old carpet – or get it home! But I have accumulated lots of tonne bags where I have had gravel delivered so I cut those up as extra insurance against stones (please let it work!) and laid them under the sand. Now I am getting materials in larger quantities (8 tonnes of sand) I am trying to avoid getting these bags, though the next lot will be used for making compost – see a much later post!
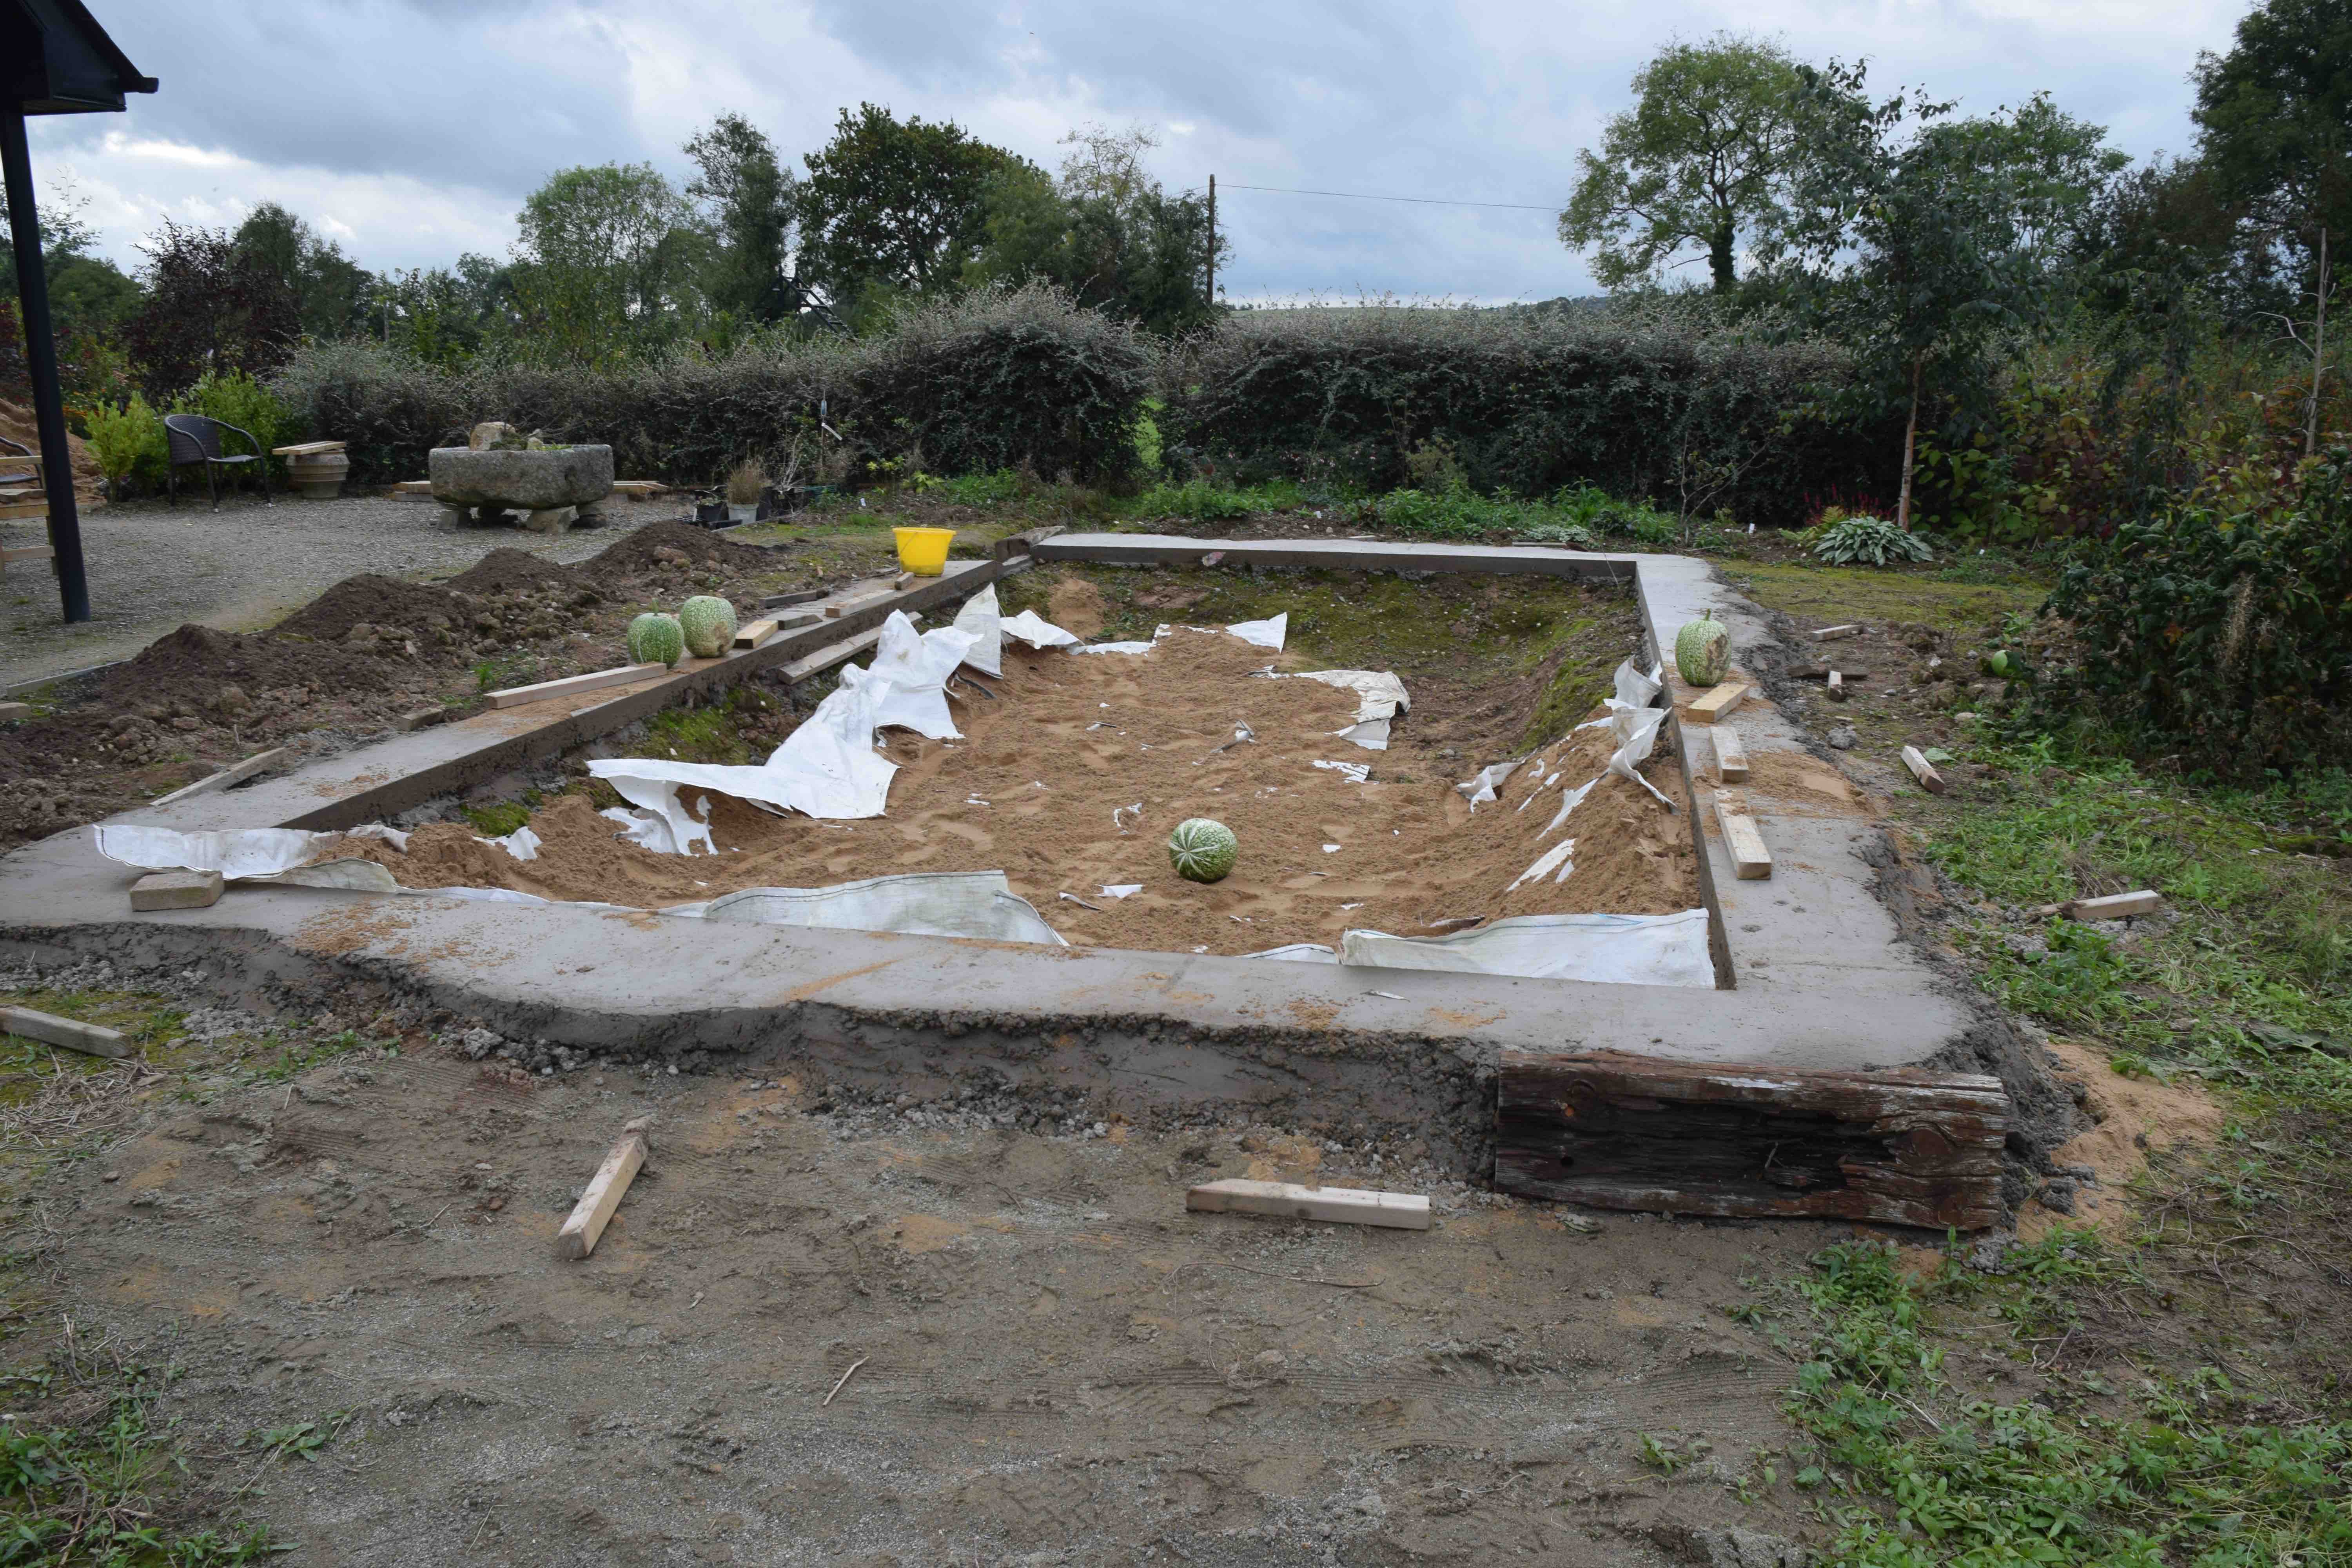
The fabric was, in fact. a pain because the wind moved it before I could get the sand on top. Some of the Malabar melons, which were allowed to grow over the area in summer, were used to hold down the sheets – top tip here: don’t use round things to hold down things on a slope.
The big advantage of using sand is that you can sculpt the shape of the pond, along with planting shelves, much more easily than with soil and carpet.

The pond is about 4m x 8m so there was a fair bit of barrowing.

The next job was getting the liner. Fortunately it was just about possible for us to carry it to the car and out of the car and to unfold along the long edge and then unfold into the pond.
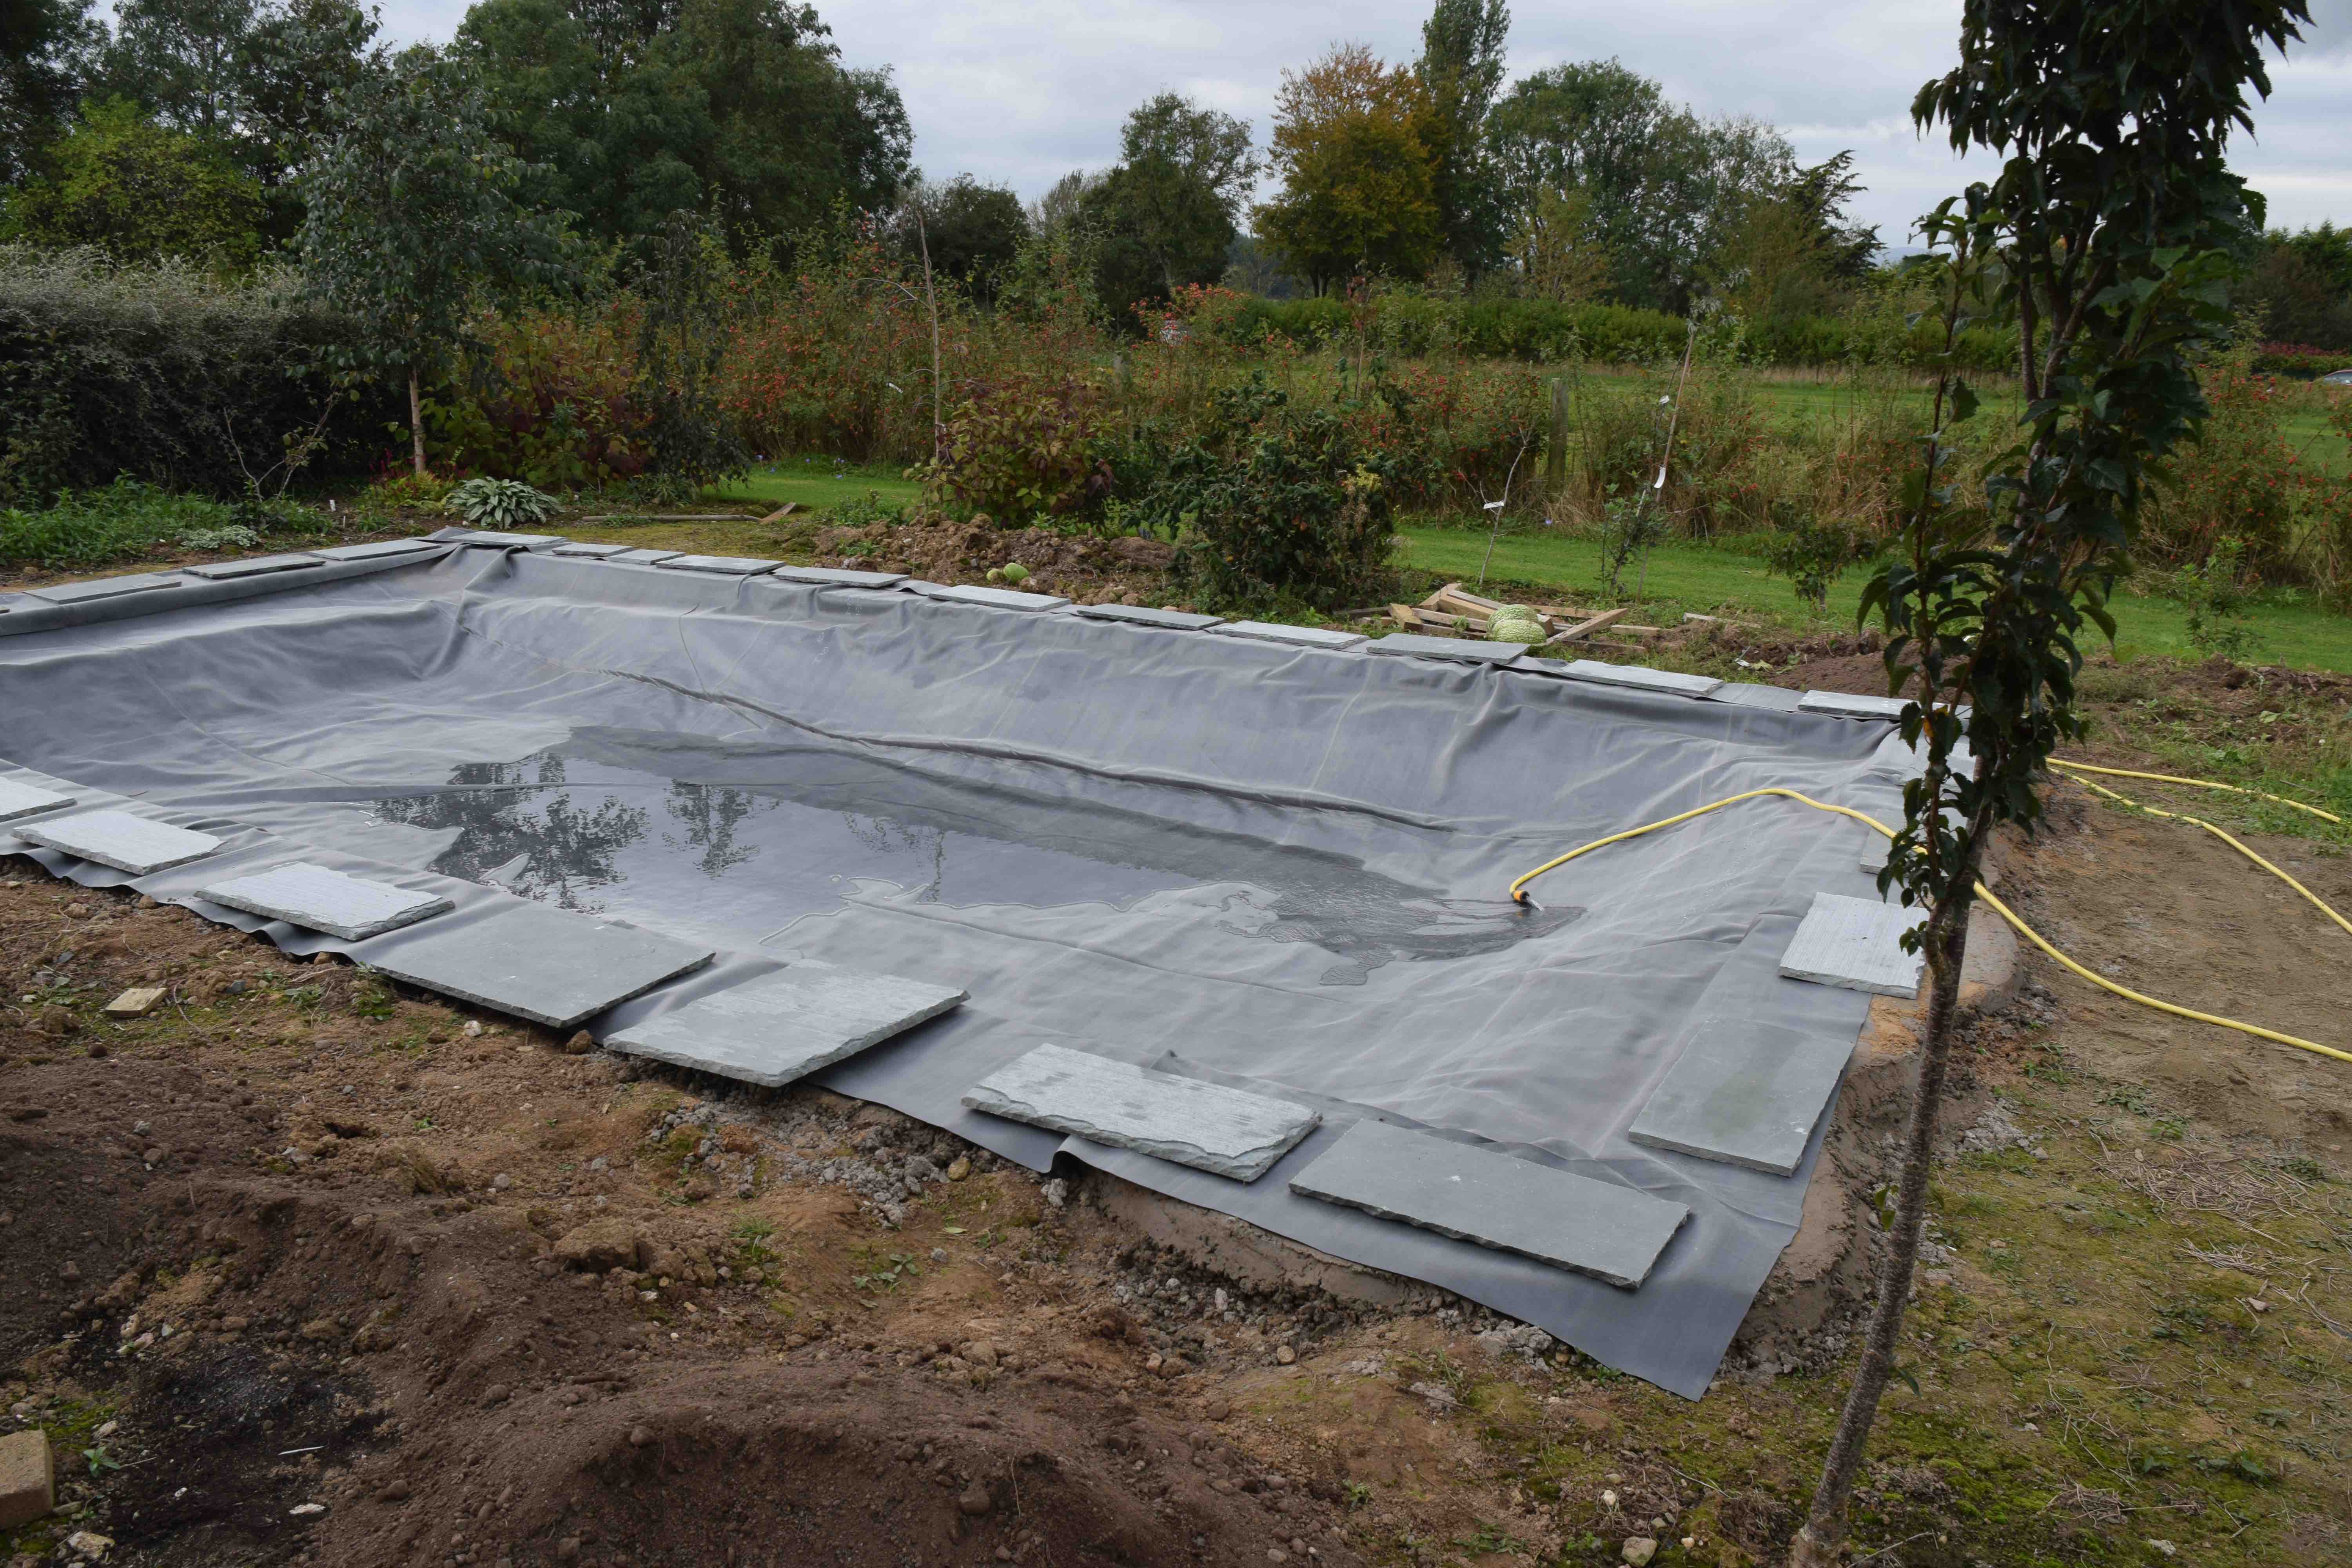
It was then cut with a good overlap, I pushed it into the shelves and laid paving around the edge to hold it down as it fills. There is no rush to fill it so winter rain will do a lot of the work. But I will fill it from the water supply – just a little at a time since I don’t want to run out of water and I don’t know how much is down there! I will get lots of ’round’ gravel in the next delivery to put in the base. The water table is high here in winter but I am hoping that because the pond is raised above ground level, by 20cm at one end, and with the gravel it will avoid the problem of the liner lifting – never nice.
With a bit of luck I can repot the waterlilies in spring and this, the main garden feature, will be done.
And while this has been going on, in spare time, the seaside garden has been having work done and the raised beds are now built and filled. I did not want to buy topsoil but it was necessary. It is very stony but quite sandy and a bit gutless but it is perfect for the plants I want to grow in these beds. Six tonnes was moved in just over a day – I just ran out of steam the first day and had to leave a little for the next morning, but got it off the drive before the rain.


Just a few tonnes of sand, gravel and cobbles and some decking to go. Then I can start beachcombing and planting.

Some amount of work. I’m exhausted just reading you!
It will look fantastic though! Looking forward to seeing the stream from pond to pond.
thank you. It may be some time before it is all complete though.
Wow!
Fabulous work and it will be outstanding when finished.
What is that aster in the first photograph? A. horizontalis?
Thank you. I will check the aster in the photo – I think it is ‘Grey Lady’ – but unstaked, hence the splayed display.
This is amazing! It’s going to look so good when it’s done.
thank you – ‘when it’s done’ is the key there!